DIY Furniture Projects for Beginners
- Interior Design
- Balsa wood properties, Balsa wood vs Basswood, Can you paint jenga blocks?, Carnauba wax, carpentry class, cool DIY projects to make at home, cool things to make at home when bored., diy, DIY aesthetic, Diy Chairs made from pallets, DIY Furniture Projects for Beginners, Diy Jenga 2x3, DIY Pallet Couch - Outdoor, diy pallet couch instructions, diy pallet patio furniture instructions, DIY Reclaimed wood art, DIY rolling plant stand, diy wire plant stand, fill gaps in miter joints, how to build a farmhouse table on youtube, how to get rid of wire hangers, How to make a giant jenga slide better, How to paint geometric triangles?, How to sew a cushion cover, how to sew a cushion cover without a zip, learn home renovation skills, pallet seat ideas, post and beam table., repurpose wire hangers, scrap 2x4 project., small wood project., Spring woodworking project, using wooden pallets in the garden., wall art with tape and paint, what to do with old fence boards, wood
- May 30, 2019
Do you ever find old scraps of wood lying around, and wonder what to do with them?
Now is the time to start thinking about DIY projects to start making the most of these disused materials. This is why I set out to find some useful things to build with wood that could be my Spring woodworking project.
Get that DIY aesthetic
Contents
I love being outdoors, and what better way than to make something useful as I do that. I also picked a couple that you would be able to make indoors – in case of a rainy day.
Essential Materials
Generally you will need some materials and tools to start off with:
- Wood – this could be scrap wood/plywood or MDF.
- sander
- Nails
- Wire
- Glue
- Paint
- Varnish
- Wax
- Hammer
- Screws
Useful things to build
When I was researching this article, a lot of the projects looked pretty, but were not very useful and would probably be thrown away after a few weeks. I have tried to find the most useful and aesthetically pleasing items for you to try at home.
Here are my DIY top 5 cool things to make at home when bored.
DIY Farmhouse Table
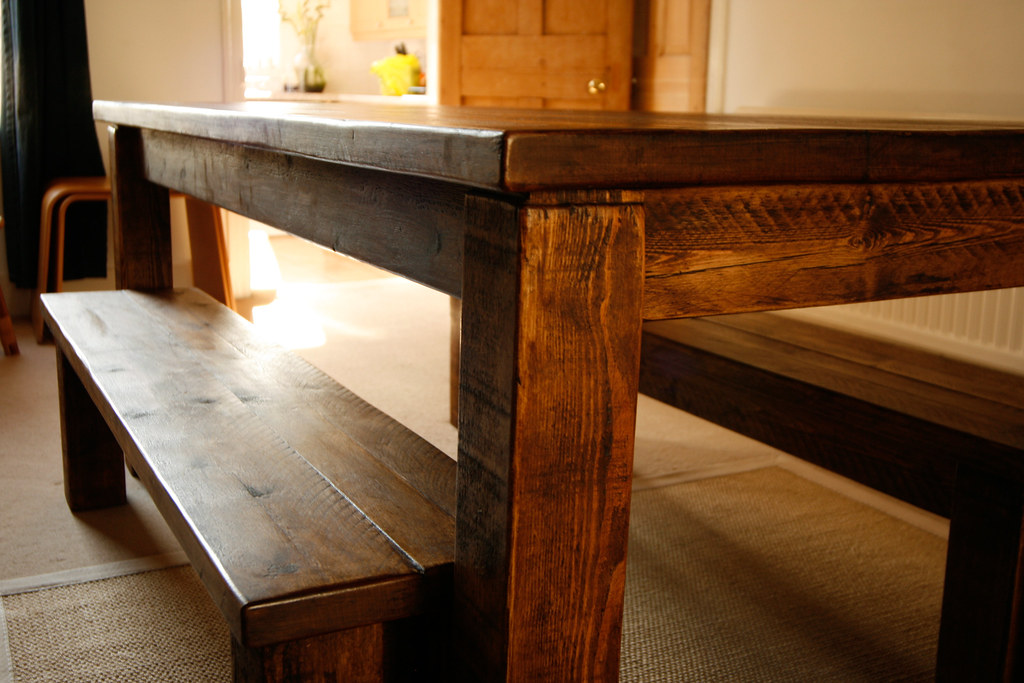
The centerpiece of family life – this industrial farmhouse table is sturdy and strong to support family mealtimes, the breaKfast rush and chilled out arts and crafts time. I tried searching how to build a farmhouse table on youtube, and a lot of the tutorials were very vague and not well taught. So I am going to try to show you in easy steps how to make this much loved post and beam table.
Instructions
- First – you need to measure out your wood and make sure everything is the height you want it . It needs to be tall enough that people can comfortably sit with their legs underneath it, but not too high.
- Once you have decided on the height. You are then going to need to cut your wood to size. This is usually the Posts and the beam.
- Now you need a drill and drill the table top to the post from the underside, making sure that no nails appear on the table top
- Now you need to sand the table and maybe plane it down depending on the style you want.
Filling gaps in farmhouse table
This is a pretty simple feature. You will need to be using a wood putty to fill gaps. Alternatively you could use a wood filler. This technique will also help you fill gaps in Miter joints if you have any weaknesses in your table.
DIY Wire Plant Stand
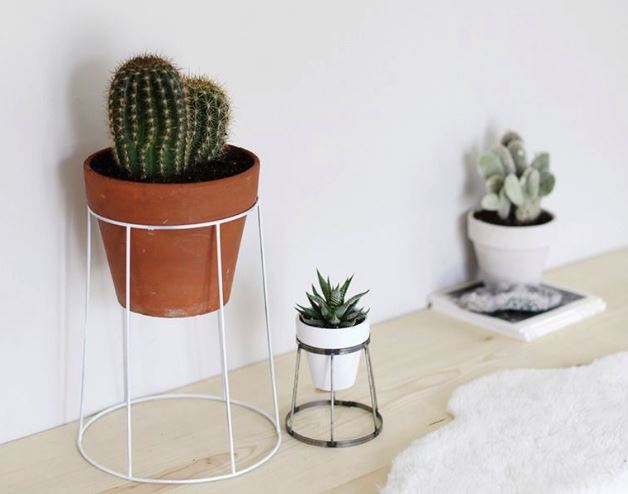
Plants are proven to improve your mood when you are at home. So let’s explore how to make a plant pot to grow your plant collection because you can never have too many plants!
I hate throwing things away so started to wonder – how to re-purpose wire hangers? And how to get rid of wire hangers?
I started with the hangers and thought about the shape I wanted. I then started to bend the coat hangers into a stand shape. There are many variations to this design. For example I added wheels to my creation and made a DIY rolling plant stand instead. This is useful because in my east facing window – the sun is too strong in the morning so I position my plant to avoid the strongest sunlight during the day.
DIY Jenga 2×3
A brilliantly fun party game. But in the summer – who wants to be huddled together in a room when you could be outside? I recently found some old scraps of wood and had the idea for a perfect scrap 2×4 project.
Life size Jenga. Probably one of the easiest projects.
All you will need is
- Scrap wood
- A saw
- Sander/sandpaper.
Method
- Cut all the blocks the same size. You will need to cut around 60 – depending on how lifesize you want it to be.
- Then you need to be careful to sand all of the edges down. This is so you don’t get a splinter when playing the game !
- Now stack in rows of 3. And i’m sure you know how the rest goes…
How to make a giant Jenga slide better
Now you have your Jenga game – you may notice it isn’t sliding well. Or the blocks are sticking. Which is *ahem* no indication of anyone’s skill level at this game. You may need to use a Wax finish to make the game run more smoothly. Carnauba wax is a good natural wax to use as it is not harmful for the skin and coats wood very well .
Can you paint Jenga blocks?
Yes – of course! This is a great way to get the kids involved or any big kids you have nearby. Paint the Jenga blocks any colour/design/pattern you want to make it more fun and Instagram friendly. You can finish it and seal it with a wood varnish especially if the blocks are living outside in all weather conditions .
DIY Chairs Made From Pallets
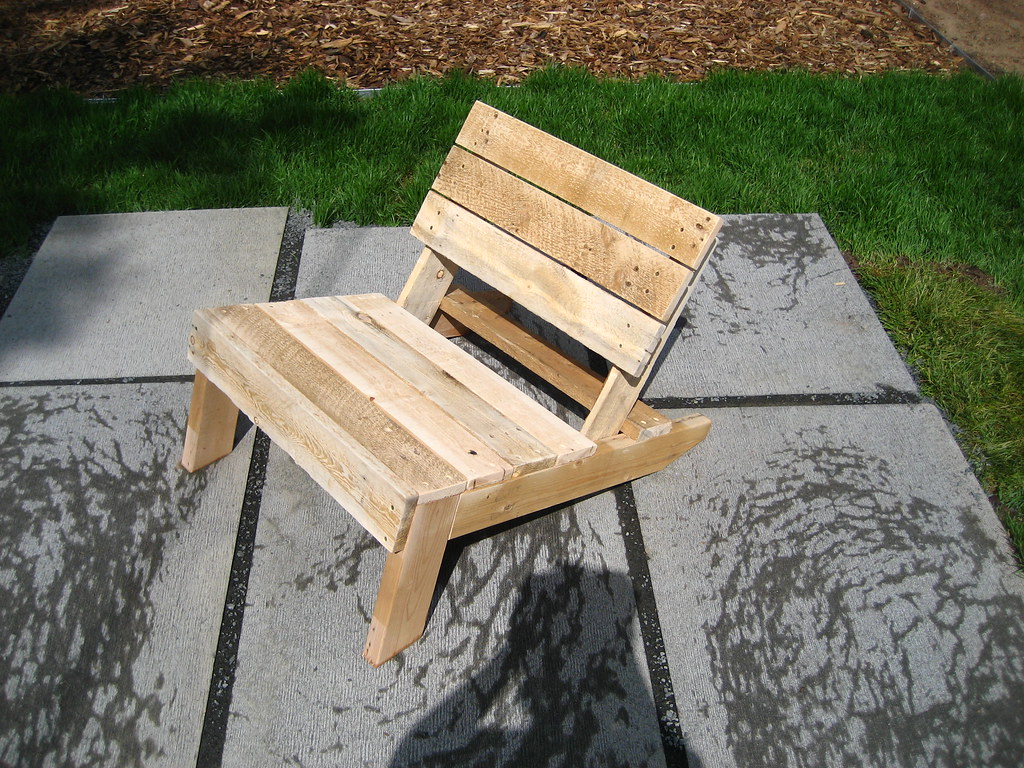
I started looking at a list of pallet chair designs, and found a lot of different styles and looks that I liked. I gathered a few pallet seat ideas to show you guys.
DIY Pallet Couch – Outdoor
This is a great one – everyone loves a garden party or BBQ. But there often isn’t somewhere to sit. These chairs can be done in a range of sizes and styles, and are surprisingly comfortable. It is a great way to start using wooden pallets in the garden.
You can also use these indoors , as it looks great indoors and outdoors. I built a corner group for my conservatory area. It is great for parties and family gatherings. I simply searched DIY pallet patio furniture instructions to get some really easy to use plans and just followed it step by step. The whole process took me 3 weeks.
Pallet Couch – Indoor
For the indoor couch, I just searched for some DIY pallet couch instructions to get a great plan for a 2-seater sofa.
How to Sew a Cushion Cover
Pallets aren’t very comfortable to sit on for a long period of time – so I would recommend making your own cushions for the sofa. This is a fun way to maybe use some scrap fabric you have lying around the house but also just be more comfy when sitting on your sofa.
- What you need
- Needle and thread
- Material
- Sewing machine (optional)
- stuffing/pillow
Often people are asking me how to sew a cushion cover without a zip , because some people prefer to use a simple zip method on their cushions for easier washing and drying. I tend to like to use buttons on my cushions because it gives a more rustic feel , but this is completely up to the creator themselves!
DIY Reclaimed Wood Art

This is the perfect easy small wood project. Spice up your apartment with some wall art! It’s cheaper and easier than you think . My apartment is very bare in places and I wanted to make the walls less bare and a little more fun.
My design has a herringbone effect and is made with paint and wood. I first saw this style of DIY Geometric wood wall art on Instagram, and I knew I had to try it out . it gives a 3-D textured effect which is really ‘in’ at the moment. Some people like to use quotes within these designs or paint triangles to create an edgy look.
How to paint Geometric Triangles?
I simply made the wall art with tape and paint. You will also need a ruler. Marking the boundary of your triangle with tape gives it a barrier , so the paint won’t smudge or run into the other section of the design. Simply wait until it dries and then remove the tape for a perfect Geometric pattern.
Balsa wood vs Basswood
This one is interesting – as both types of wood are a favourite among people who create this style of art. Balsa wood properties are that it sands easier, but is very weak. And Basswood is a lot stronger but harder to work with. People often ask me is Balsa good for carving into patterns? Which it is very good for carving, but because of this ease, it also makes it very weak.
As this is a wall hanging however, I would say that it does not have to be durable or hard wearing so I could recommend using balsa wood for this type of project.
Design
Don’t be afraid to be brave and go a bit crazy with paint and colours and patterns. This adds a unique flare and ultimately personalise all of these items. If you are making them to sell this is also a good way to create some brand design identity so other people will know , just by looking , who created this fabulous design.
Upkeep
You may need to upkeep your wooden furniture , and some of the things you have made. Especially if they are living outside . As mentioned before: staining the wood gives it a protective barrier from the elements, as does varnishing, waxing or oiling.
How to Stain Pallet Wood With Vinegar

You may also want to stain your pallet wood so it fits in with a certain colour scheme you may have going on and so it does not look just like scrap wood. Remarkably, you can also do this with items you may have lying around.
You will need:
- distilled white vinegar
- A mason jar
- Steel wool
- Paintbrush
- Paper towel
- First, pour the wool into the mason jar along with the vinegar. Let it react for 24 hours.
- Then, filter this from the jar using the paper towel.
- You have the option to filter this again before then thinly applying it to the wood with the paintbrush.
This is a really effective way to get some very natural, dark colours from the wood.
This will also stop it from weathering and breaking.
For the cushions – you may need to waterproof them by simply taking them inside or you could invest in a waterproof cover for garden furniture. This again will just improve the longevity of these items to be enjoyed again and again!
Conclusion
To conclude – there are a lot of easy scrap wood projects out there. You may be getting a new fence one day and wonder what to do with old fence boards. Now that you have this new knowledge, hopefully you will feel inspired. The world is your oyster – You can decorate your home with some of these tips; check out my article for more tips and tricks on DIY!
Now have a go yourself with these 5 projects, or think of your own! There are so many cool DIY projects to make at home, it will also help you learn home renovation skills without having to go to carpentry class.
It is great in this day and age to be Reusing, Reducing and Recycling, and this is a great way to do that and get something new at the end of it. Check out Our Services page to find out how we can work with you in your next project.
I have had some great successes in some of my builds and it has also manifested into a creative outlet and a way to sell some of the projects I have made.


