
How To Install LED Recessed Lighting Retrofit
- Interior Design
- May 10, 2024
LED recessed lighting retrofit is a popular choice for homeowners looking to upgrade their lighting fixtures.
We discuss the benefits of LED recessed lighting retrofit, including energy efficiency, longer lifespan, and design versatility.
Learn how to install LED recessed lighting retrofit with a step-by-step guide and safety precautions during installation.
Avoid common mistakes when installing LED recessed lighting retrofit and discover more about this innovative lighting solution.
What Is LED Recessed Lighting Retrofit?
Contents
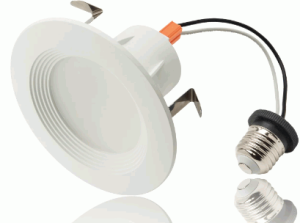
LED Recessed Lighting Retrofit involves upgrading existing recessed lights with more energy-efficient and longer-lasting LED downlights. It is a process of replacing older lighting fixtures with modern LED technology to enhance both the lighting quality and energy efficiency.
By retrofitting your recessed lights with LED technology, you not only reduce energy consumption and lower electricity bills, but you also contribute to a more sustainable environment by decreasing your carbon footprint. The longevity of LED downlights means less frequent replacements, saving you time and money in the long run.
Uncover more: Are LED Ceiling Lights Any Good

Why Choose LED Recessed Lighting Retrofit?
LED Recessed Lighting Retrofit is a popular choice due to its energy efficiency, longer lifespan, and versatility in design options. It offers significant advantages over traditional lighting systems.
One of the key reasons why individuals opt for LED Recessed Lighting Retrofit is its remarkable energy efficiency. LEDs consume substantially less energy than traditional lighting, leading to lower electricity bills and reduced environmental impact. Their longer lifespan means less frequent replacements are needed, saving both time and money in the long run. The design flexibility of LED retrofit options allows for creative and customizable lighting solutions that can enhance the aesthetic appeal of any space.
Energy Efficiency
One of the key benefits of LED Recessed Lighting Retrofit is its outstanding energy efficiency. LEDs consume less power compared to traditional lighting, resulting in lower electricity bills and reduced energy consumption.
LED technology is known for its ability to significantly reduce energy costs in various settings, from residential to commercial spaces. By emitting light in a more focused manner, LEDs waste less energy in the form of heat compared to incandescent or fluorescent bulbs.
This efficient use of energy not only saves money on utility bills but also has positive environmental impacts. Lower energy consumption means reduced greenhouse gas emissions and a smaller carbon footprint.
The long-term savings associated with LED retrofit lighting solutions should not be underestimated. Although the initial investment may be higher than traditional lighting options, the reduced maintenance and longer lifespan of LEDs result in cost savings over time.
Longer Lifespan
LED Recessed Lighting Retrofit offers a significantly longer lifespan than traditional lighting options. LEDs can last tens of thousands of hours, reducing the frequency of replacements and maintenance.
This extended durability and longevity of LED fixtures not only provide a reliable lighting solution but also lead to substantial cost savings. With reduced maintenance requirements, businesses and homeowners benefit from lower operating expenses and minimized downtime.
The convenience of not having to replace bulbs frequently is another important advantage of opting for an LED retrofit. This means less hassle and disruption to daily routines, as the need for bulb replacements is greatly reduced.
Versatility In Design
LED Recessed Lighting Retrofit provides a wide range of design options to suit various interior aesthetics. From adjustable brightness to color temperature choices, LED lights offer versatility in creating the desired ambiance.
One of the key benefits of LED Retrofit Lighting is its ability to customize the lighting to perfectly complement the decor. Whether you prefer a warm, cozy atmosphere or a bright, energizing space, LEDs can be tailored to meet your specific needs. The flexibility of LED technology allows for various lighting effects such as dimming options, color-changing features, and even smart controls for a modern touch.

What Are The Steps To Install LED Recessed Lighting Retrofit?
The installation process of LED Recessed Lighting Retrofit involves several steps that can be tackled as a DIY project or done with the assistance of an electrician. Whether it’s for a shed or updating the interior lighting, proper wiring, tools, and materials are essential.
Before starting the installation, it’s crucial to turn off the power to the existing light fixture at the breaker panel for safety. Once the power is off, you can begin with the wiring preparation. Make sure to gather essential tools like wire strippers, electrical tape, and wire nuts.
The next step involves removing the existing light fixture and carefully following the manufacturer’s instructions for your LED recessed lighting kits. Properly connect the wiring, typically black to black, white to white, and ground to ground.
Gather Materials
Before starting the installation, gather the necessary tools and materials, including a Phillips screwdriver, smart Wi-Fi-enabled LED downlights, and any additional accessories required for the retrofit.
Aside from the Phillips screwdriver and smart Wi-Fi-enabled LED downlights, you may also need a voltage tester and wire strippers to ensure safety during the installation process. It’s important to have a ladder or sturdy step stool on hand for reaching high ceilings where the downlights will be installed.
Depending on your existing setup, you might require a junction box, electrical tape, and wire connectors to integrate the new smart downlights with your home’s electrical system seamlessly.
Turn Off Power
Safety is paramount during the installation process. Before proceeding, ensure to turn off the power to the lighting circuit and use safety glasses, a dust mask, and mark relevant areas with a sharpie for precise retrofitting.
Turning off the power is crucial to prevent any accidents or electric shocks. Make sure to locate the correct circuit breaker and switch it off before starting any work.
- Don’t forget to wear safety glasses to protect your eyes from debris and dust that may be present during the installation process.
- Using a dust mask is essential to safeguard yourself from inhaling harmful particles that might be released when handling lighting fixtures.
- Marking the areas for retrofitting with a sharpie will help you identify the exact spots that need attention, ensuring a smooth and safe installation.

Remove The Old Light Fixture
To begin the installation, remove the old light fixture by detaching any securing clips or screws. Utilize a drill adaptor for efficient removal and consult online tutorials or YouTube videos for visual guidance.
When dealing with the old light fixture, carefully inspect the area to locate all the clips and screws holding it in place. Use a screwdriver to loosen any visible screws and gently detach the clips to free the fixture. For stubborn parts, a drill adaptor can be particularly handy for a quicker removal process without causing damage.
If unsure about any step, turning to online resources such as tutorials and YouTube videos can provide valuable insights and tips from experts in the field. These visual guides can offer a step-by-step walkthrough for a smoother removal process, especially if you are new to handling light fixtures.

Prepare The Area
After removing the old fixture, prepare the area for the retrofit installation. Check for any spring-loaded divots, secure brackets, or sheet metal attachments that may need adjustments or removal before proceeding with the retrofit.
Inspect the fixture surroundings thoroughly to ensure a seamless transition. Address any protruding spring-loaded divots carefully to avoid interference during the new fixture installation process. Secure brackets play a crucial role; make sure they are positioned correctly for stability. Examine sheet metal attachments closely, modifying or removing them as necessary to accommodate the retrofit. By addressing these key components preemptively, you pave the way for a successful and efficient installation of the new fixture.
Install The Retrofit Kit
Next, install the LED Retrofit Kit securely in place using markers for alignment, a punch for creating screw holes, and screws/sockets for fastening the kit to the housing. Ensure a precise and stable installation.
Begin the process by carefully marking the exact positions where the kit will be mounted, ensuring that the alignment is spot on. Use the punch tool to create precise holes for the screws with accuracy and ease. Then, delicately secure the kit in place using the designated screws or sockets, ensuring that each fastener is tightened firmly to guarantee stability and durability in the installation. Pay attention to every detail to ensure that the retrofit kit is mounted securely and functions optimally.

Connect Wires
Connect the wires according to the circuitry diagram provided with the retrofit kit, using appropriate power tools for wire connections. Ensure proper wiring to guarantee the safe and efficient operation of the LED downlights.
Proper wiring is crucial as it not only ensures the functionality of the LED downlights but also plays a significant role in maintaining electrical safety within the space. The circuitry diagram acts as your guide, indicating the specific connections that need to be made. Take your time to carefully match the wires and terminals, avoiding any cross-connections.
Double-check each connection before securing them in place. This step is vital to prevent any potential short circuits, which could lead to malfunctions or even pose a fire hazard.

Secure The Retrofit Kit
Secure the retrofit kit firmly in place, ensuring all attachments are fixed securely to the housing or drywall. Follow a systematic installation process to guarantee a stable and long-lasting lighting setup.
Before beginning the installation, carefully inspect the retrofit kit components and verify all necessary tools are readily available.
- Attaching the mounting brackets: Start by attaching the mounting brackets securely to the housing or drywall using the provided screws and anchors.
- Connecting the wiring: Follow the manufacturer’s instructions to connect the wires correctly and make sure they are well insulated.
- Securing the fixture: Once all the components are in place, secure the fixture properly to the brackets to avoid any movement.

Install Trim And Bulb
Complete the installation by affixing the trim and bulb to the retrofit kit using screws and sockets provided. Wear safety glasses during this step to protect your eyes from any debris or sharp edges.
Once you have securely attached the trim and bulb to the retrofit kit, ensure that all components are properly aligned for optimal performance. Use the appropriate tools to tighten the screws and sockets, avoiding over-tightening to prevent damage.
It is recommended to double-check the connections to guarantee a snug fit, promoting safety and efficiency. Your attention to detail during this final stage plays a crucial role in the functionality and longevity of your newly installed retrofit kit.

What Are The Safety Precautions To Take When Installing LED Recessed Lighting Retrofit?
When installing LED Recessed Lighting Retrofit, it’s crucial to prioritize safety precautions. Ensure to wear safety glasses, use sandpaper for smooth edges, tape for secure wiring, mark areas with a sharpie, and wear a dust mask for respiratory protection.
These safety measures play a vital role in ensuring a smooth and secure installation process. Safety glasses protect your eyes from any debris or possible sparks while using sandpaper helps in achieving precise and polished finishes on the edges. Securely taping the wiring minimizes the risk of accidents. Marking areas with a sharpie aids in accurate placement, making the task more efficient. Wearing a dust mask shields your respiratory system from harmful particles, allowing you to work comfortably and safely.
Turn Off Power
As the initial safety precaution, always turn off the power to the lighting circuit before beginning any work. Wear safety glasses, mark areas with a sharpie for clarity, and use a dust mask to protect against potential debris.
Turning off the power supply is crucial in ensuring that you are safe from electrical hazards while working on the lighting circuit. This simple step can prevent accidents and ensure a secure working environment. Wearing safety glasses provides protection for your eyes against any stray debris or particles that may be dislodged during the installation process.
Marking areas with a sharpie not only helps you identify key points easily but also aids in precision and accuracy. By clearly labeling components, you minimize the risk of errors and ensure a smoother installation process.
Using a dust mask is essential for protecting your respiratory system from inhaling dust and other airborne particles. It is a small yet effective measure to safeguard your health throughout the installation, especially if you are working in a dusty environment.
Use Proper Tools
Utilize the appropriate tools for the installation, such as clips for secure fastening, ensuring a smooth retrofit process.
Having the right tools on hand is crucial when it comes to retrofitting LED recessed lighting. Proper tools not only make the installation process more secure but also guarantee a seamless and efficient retrofit. The use of clips is particularly important as they ensure the fixtures are securely attached, preventing any potential hazards.
By investing in quality tools, you not only improve the safety of the installation but also enhance the overall quality and longevity of the retrofit. The right tools make the entire process more manageable and effective, resulting in a professional finish that meets the highest standards.
Secure Wires
Ensure wires are securely connected by an electrician or DIY enthusiast, using spring-loaded mechanisms for stable fixtures and sockets for proper connections. Don’t forget to wear safety glasses during this process for eye protection.
Properly securing wires is crucial to safeguard against electrical hazards and ensure the smooth functioning of your electrical systems. Spring-loaded mechanisms play a key role in keeping fixtures in place, preventing any accidental disconnections that could lead to malfunctions or safety risks.
Using sockets for connections enhances the stability and conductivity of your electrical setup. Secure connections prevent potential short circuits or electrical fires, maintaining a safe environment for both residents and property.
Remember, safety should always be a top priority when working with wires. Investing in a pair of safety glasses can protect your eyes from sparks, debris, or accidental wire slippage during installation or maintenance tasks.
Follow The Manufacturer’s Instructions
Adhere strictly to the manufacturer’s instructions provided with the LED retrofit kit. Pay attention to details such as metal attachments, divots, and proper socket alignment to ensure a successful and safe installation.
Following these guidelines is crucial as they are designed to maximize the efficiency and longevity of your LED retrofit. Metal attachments must be securely fastened to guarantee stability and prevent any potential hazards. Handling divots carefully is essential to avoid damage to the housing or internal components, ensuring a seamless fit. Proper socket alignment is key to smooth electrical connections and optimal performance, preventing any flickering or dimming issues. By meticulously following these instructions, you can confidently transform your lighting system with precision and reliability.
What Are The Common Mistakes To Avoid When Installing LED Recessed Lighting Retrofit?
Avoiding common mistakes is crucial during the LED Recessed Lighting Retrofit installation. These include not turning off the power, improper attachment of screws and sockets, and not following the manufacturer’s instructions diligently.
- Before starting the retrofit process, always remember to switch off the power to avoid any electrical mishaps.
- Properly attaching the screws and sockets is essential as loose fixtures can pose a hazard.
- Ensure that you meticulously adhere to the manufacturer’s instructions as they are tailored for a successful installation.

Not Turning Off Power
One common mistake to avoid is not turning off the power supply before commencing the LED Recessed Lighting Retrofit. This oversight can lead to safety hazards, increased installation costs, and potential damage to the lighting system.
By shutting off the power source, you significantly reduce the risk of electrical shock or fire accidents during the retrofitting process. It also prevents the unnecessary expense of repairing or replacing damaged equipment due to power surges or shorts caused by working on live electrical components. Taking this crucial safety step ensures a smooth and hassle-free installation, protecting both the installer and the integrity of the lighting system.
Not Securing Wires Properly
Improperly securing wires can lead to circuitry issues and malfunction in the LED Retrofit Lighting system.
Therefore, it is paramount to ensure all connections are firmly secured to avoid potential electrical hazards and system inefficiencies. Correct socket fastening plays a crucial role in maintaining the stability of the overall electrical setup. Proper screw placements not only prevent loose connections but also contribute to the longevity and performance of the lighting system. Neglecting these essential steps could result in short circuits, overheating, flickering lights, and in severe cases, electrical fires. By adhering to these fundamental installation practices, one can safeguard their LED Retrofit Lighting system and ensure optimal functionality.
Not Following Manufacturer’s Instructions
Failing to adhere to the manufacturer’s instructions can result in misalignments, unstable brackets, and improper handling of divots during the LED Recessed Lighting Retrofit. It is essential to follow the provided guidelines for a successful installation.
When the instructions are not meticulously followed, misalignments can occur, leading to uneven lighting distribution and aesthetic inconsistencies. The stability of the brackets is crucial to ensure the safety and durability of the lighting fixtures. Bracket instability can endanger the entire setup, posing risks of falling fixtures or unstable lighting. Mishandling divots can result in improper insulation, potentially causing electrical hazards. To avoid these issues and ensure a smooth retrofit process, meticulous adherence to the manufacturer’s instructions is paramount.
Not Using Proper Tools
The absence of proper tools can lead to complications and errors during the LED Recessed Lighting Retrofit. Ensure you have safety glasses, a sharpie for markings, and other necessary tools to facilitate a smooth and successful installation.
These tools not only enhance efficiency during the installation process but also promote safety standards by protecting your eyes and enabling accurate measurements. Safety glasses shield your eyes from potential debris or sparks, while a reliable Sharpie helps in the precise placement of the lighting fixtures. Alongside these essentials, having a step ladder for reaching ceilings, a drill for mounting brackets securely, and a stud finder for locating beams are critical tools that contribute to a hassle-free retrofit process.


